Import historical data
If you have already enabled Cloud Billing export to BigQuery, after connecting your Google Cloud organization to the DoiT Platform, you can upload historical Google Cloud billing data into the DoiT Platform to take advantage of DoiT's intelligent technology.
Before you begin
DoiT Platform only supports the schema of Cloud Billing detailed usage cost data when importing historical data. Confirm that you have enabled Detailed usage cost data export for your BigQuery dataset in the Google Cloud console.
You can only import the historical Cloud Billing data that you already have in your BigQuery dataset.
If you enable the detailed usage cost data export for a multi-region location (EU or US) BigQuery dataset for the first time, Google exports Cloud Billing data retroactively from the start of the previous month (see Data availability), which means, your dataset doesn't contain usage data before the previous month.
You can follow the same process to import the historical billing data of a project that has moved from a non-DoiT billing account to a DoiT account.
To avoid potential data latency issues, we suggest waiting for 72 hours after you complete transferring Google Cloud projects before you begin importing historical data.
Identify the service account
Log in to the DoiT Console, select the gear icon () from the top navigation bar, and then select Google Cloud.
Select your desired service account, and copy the service account email.
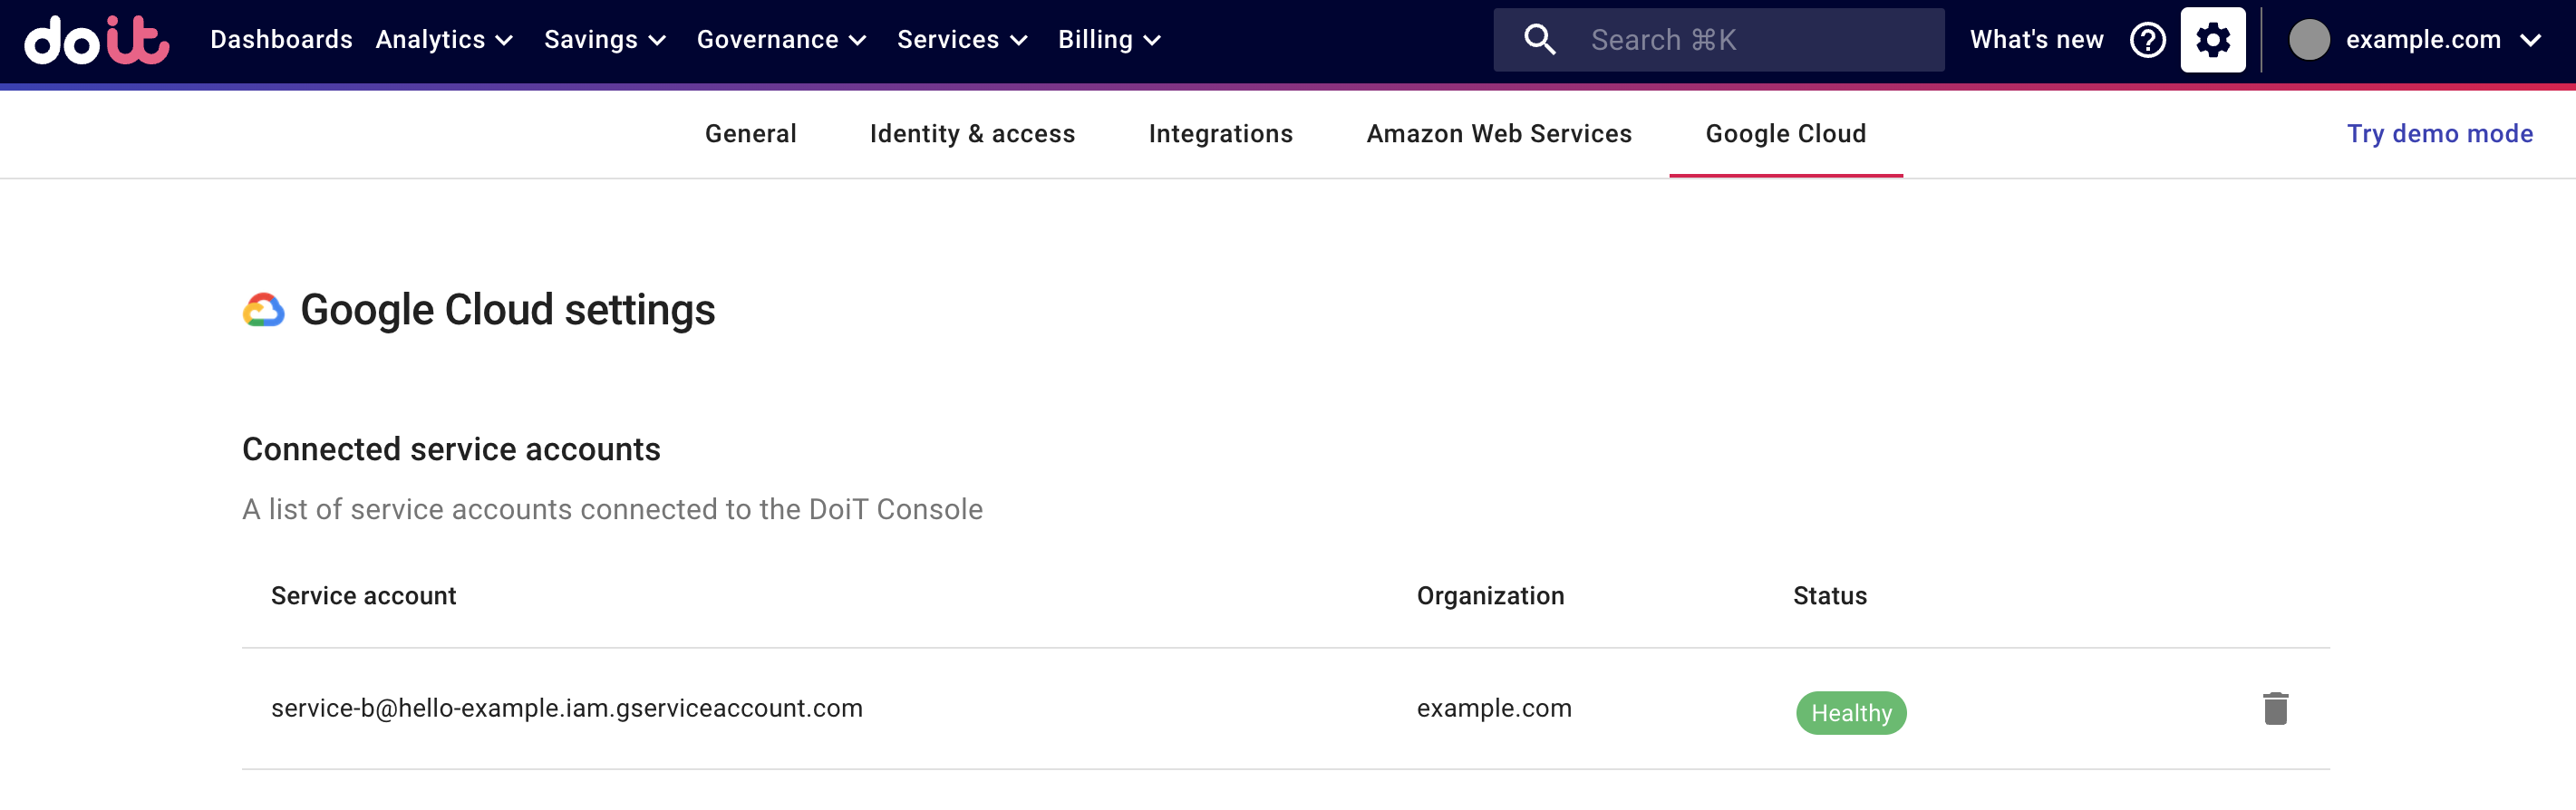
Google Cloud Docs: Listing service accounts
Grant the required permissions
Your Google Cloud account must have the necessary IAM role to grant the required permissions to the service account.
Grant the BigQuery Data Viewer role
You can provide the BigQuery Data Viewer role using either the Google Cloud console or the bq command-line tool.
Google Cloud console
Navigate to the BigQuery Console. Locate the dataset that contains your Cloud Billing data.
See alsoGoogle Cloud Docs: Getting dataset information
In the details panel, select Sharing, and then select Permissions.
Select Add principal.
In the New principals field, paste the email address of the service account that has been linked to the DoiT Platform.
For Select a role, choose BigQuery and the predefined IAM role BigQuery Data Viewer.
Select Done to apply the changes.
bq commands
Copy the command code snippets below and run them in sequence in the Google Cloud Shell.
gcloud config set project $customer_billing_project_id

bq show --format=prettyjson $DATASET_ID |
  jq '.access = .access + [{"role": "READER", "userByEmail": "$customer_service_account' \
  >permissions.json

bq update --source permissions.json $DATASET_ID
Grant the bigquery.jobs.create permission
Log in to the Google Cloud console, select your organization.
Navigate to the Roles page.
Select the DoiT Service Account, check if the
bigquery.jobs.createpermission has been granted.If yes, no further action is needed since the permissions are inherited by the projects.
If not, select Edit Role and add Permission: bigquery.jobs.create.
Link your direct billing account
- Assets Manager
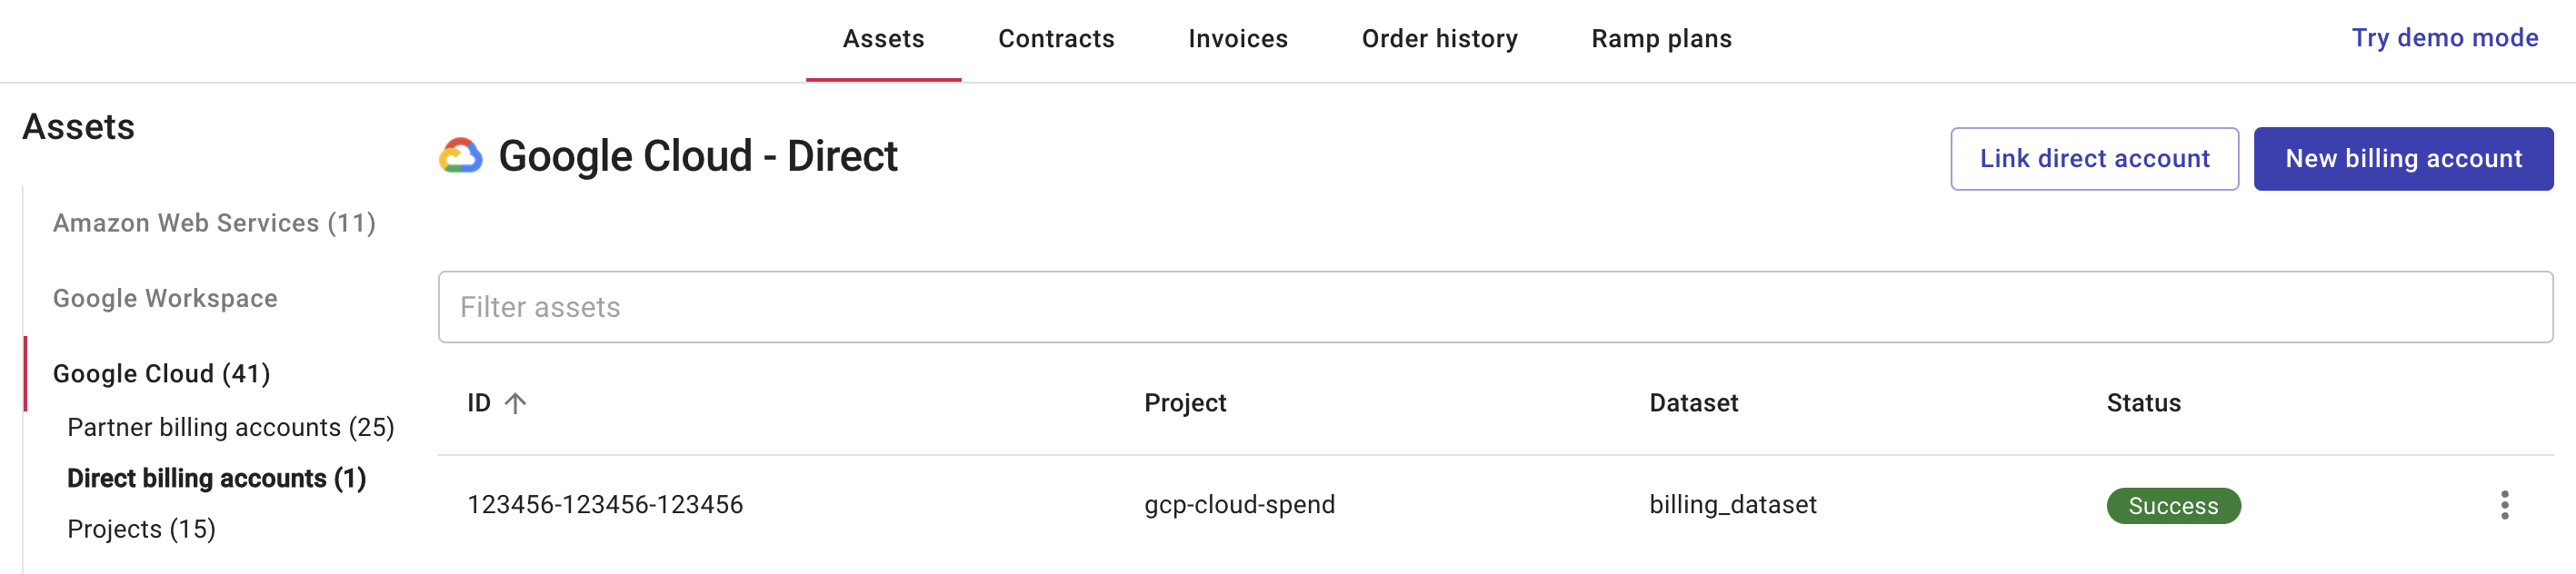
Log in to the DoiT Console, select Billing from the top navigation bar, and then select Assets.
Select Google Cloud from the left-hand menu.

Select Link direct account.
Enter the following information:
Billing Account ID: The ID of your direct billing account. You can find your Cloud Billing accounts on the Manage Billing Accounts page in the Google Cloud console.
Source Project ID: The ID of the project that contains your BigQuery billing export data. See Identifying projects.
Source Dataset ID: The ID of the dataset that contains your BigQuery billing export data. See Getting dataset information. The dataset name is also referred to as the dataset ID.
Select Import to continue.
Import status
Status: Success
Once the backfill process starts, the status of the billing account will show Success. Note that depending on the volume of your historical data, it may take 24 hours or more to complete the backfill.
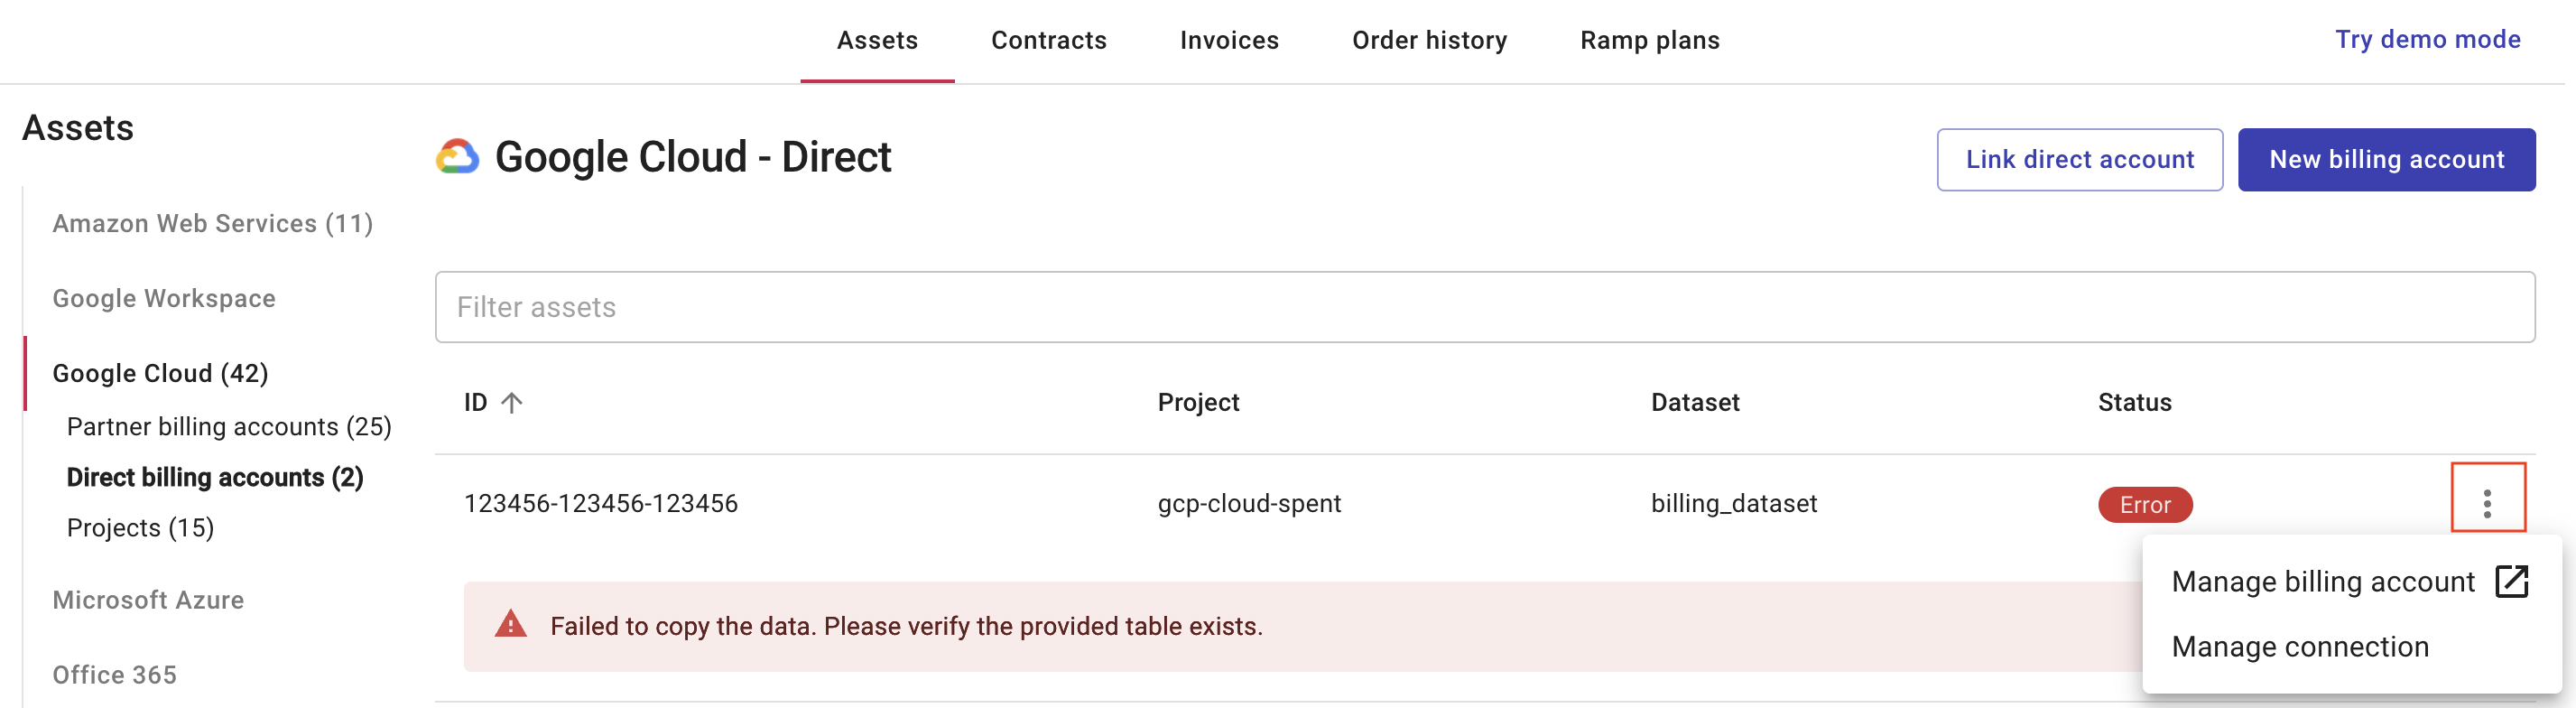
Status: Error
If the status of the billing account shows Error after selecting Import, check whether the information provided is accurate.
To correct the source project ID and the source dataset ID, select the three dots menu (⋮) at the rightmost end of the billing account entry row, and then select Manage connection to update the information.
If the billing account ID needs an update, please open a support ticket to ask DoiT support team to remove the connection, then follow this page to link the correct billing account.
Troubleshooting
My imported data is incomplete
Because of Google Cloud's frequency of data loads, after transferring Google Cloud projects to your Cloud Billing accounts with DoiT, data related to the period before the transfer will continue to go to the "old" Billing account.
Importing historical data into the DoiT Platform is a one-time operation. To ensure you have the complete billing data, we suggest you wait 72 hours after transferring projects before you start importing historical data.
If your imported data is incomplete, please open a support ticket to remove the connection. Then you can re-import the data.
My data doesn't show up
When importing historical data, the DoiT Platform only supports the schema of Cloud Billing detailed usage cost data. See Before you begin.