Invoice settings and bucketing
In the DoiT Console you can specify how you're billed for cloud assets: to get one invoice per asset type, or one invoice per custom bucket (invoice bucketing).
- Billing Profile Admin
Invoice settings
Each billing profile has its own invoice settings.
To access the invoice settings:
Log in to the DoiT Console, select Billing from the top navigation bar, and then select Billing profiles.
Select the billing profile name, or select the three dots menu (⋮) at the rightmost end of the billing profile entry and choose Edit.
Select the section of Invoice Settings.
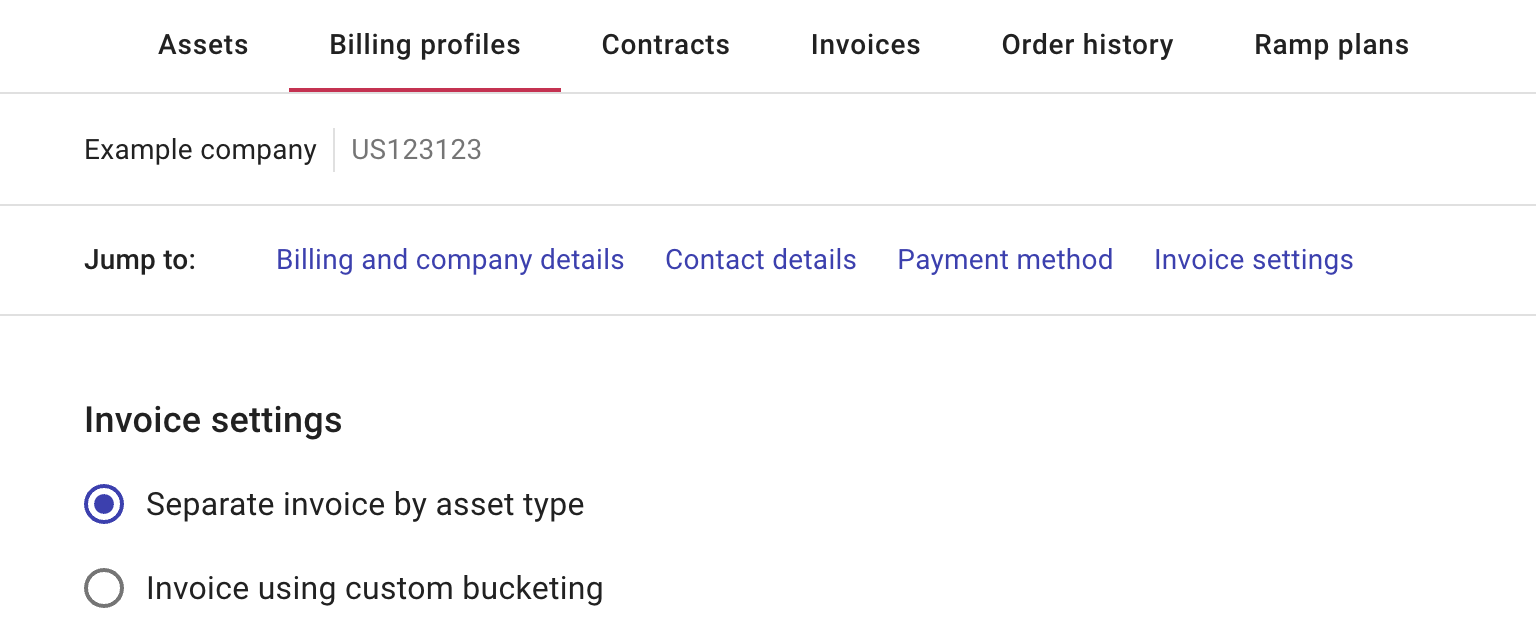
Separate invoice by asset type: Receive one invoice per asset type.
Invoice using custom bucketing: Receive one invoice per custom bucket, also known as Invoice bucketing.
You can always switch between the two options. The DoiT Platform keeps your custom buckets configurations, including the assets assignments.
Invoice bucketing
Custom bucketing allows you to generate invoices with flexibility. Typical use cases include:
You have several cost centers in the same billing profile, and you want separate invoices for each cost center. Cost centers are entities (for example, products, environments, teams) in your organization to which costs can be allocated.
You have many projects in the same billing profile, and you want separate invoices for different groups of projects.
Instead of creating multiple billing profiles, you can create multiple custom buckets and assign assets to the relevant buckets. You will then receive separate invoices for each bucket, billed to your billing profile.
Create a bucket
Once you selected Invoice using custom bucketing, you can create buckets and assign assets.
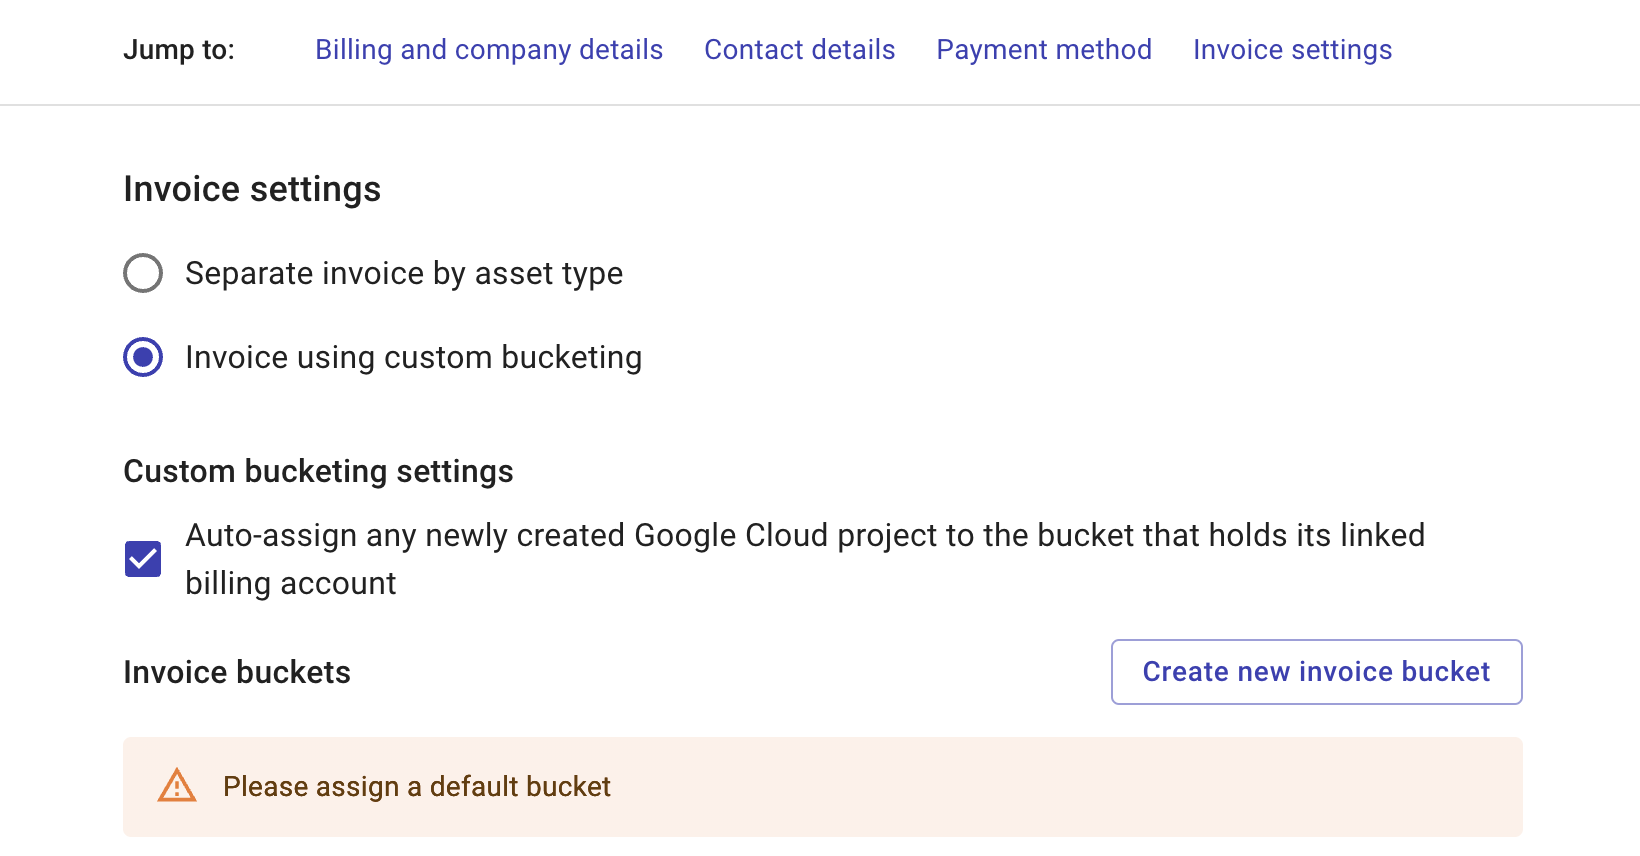
To create a new bucket:
Select Create new invoice bucket.
Enter a bucket name.
Select Create new invoice bucket.
If successful, the new bucket will appear on the bucket list.
Assign assets to a bucket
When using custom bucketing, it's important to have all your assets assigned properly.
To assign assets to a bucket:
Select the target bucket from the bucket list.
Select the assets field of the bucket, and then choose assets from the list.
NoteYou can choose multiple assets as long as they are of the same asset type. The DoiT Platform doesn't allow mixed asset types in the same bucket.
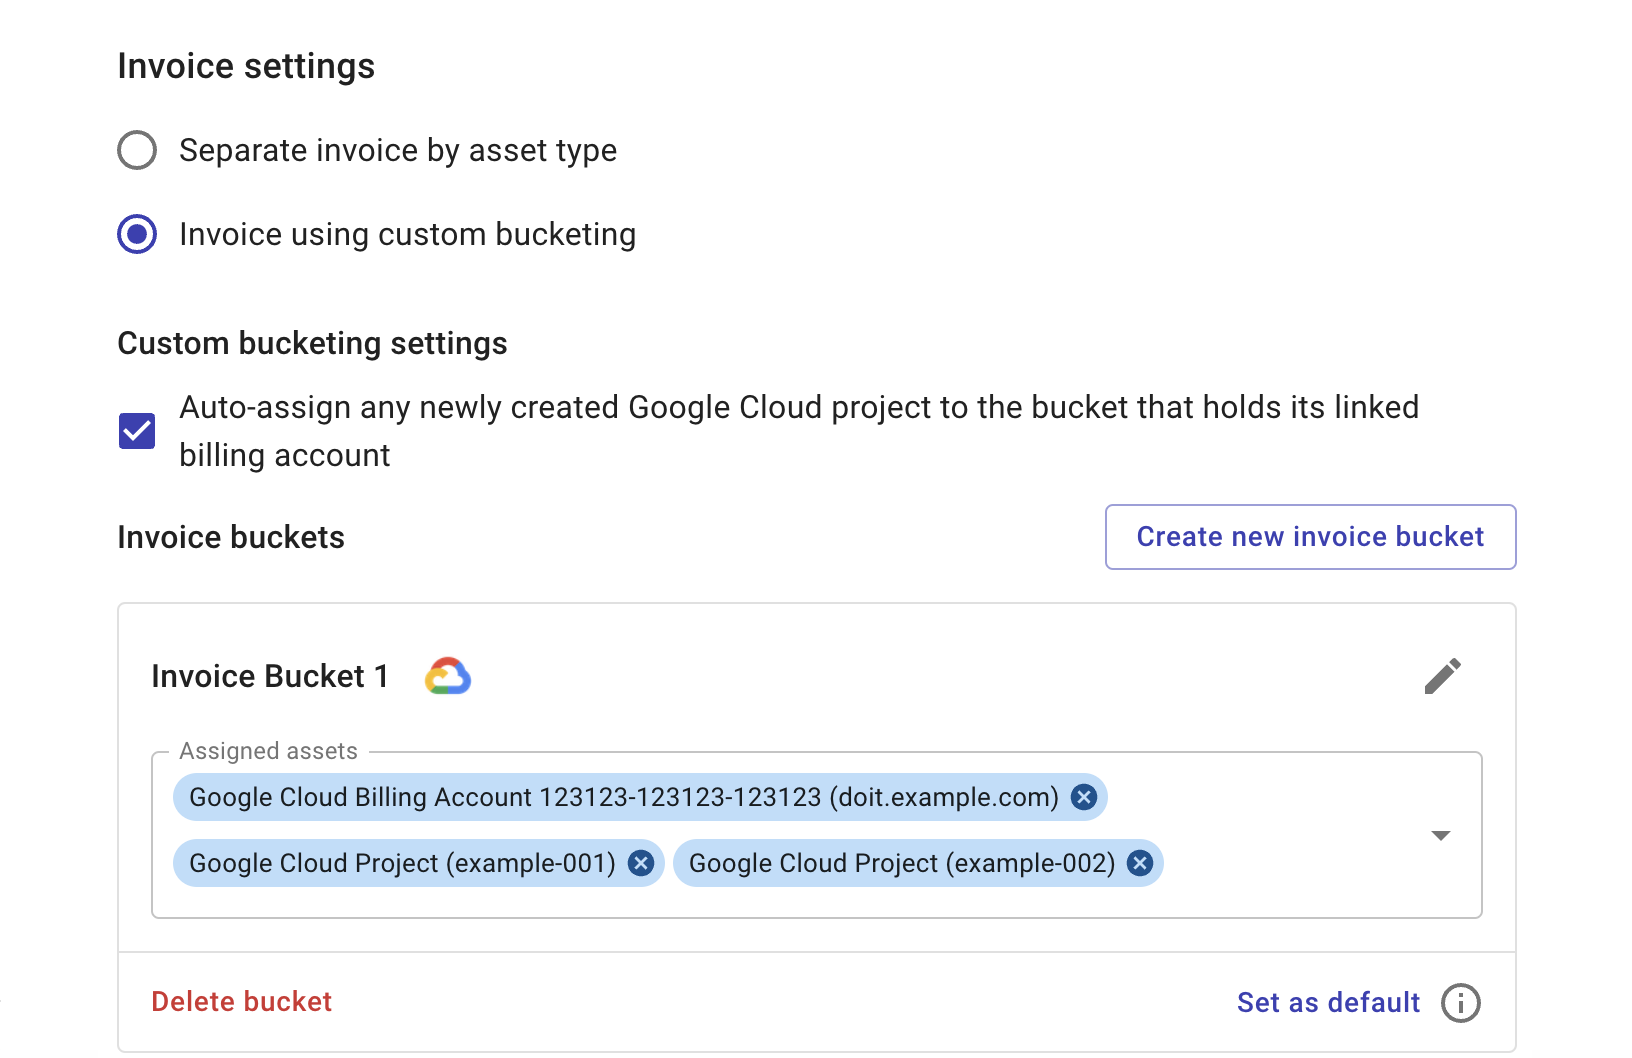
Google Cloud assets
Google Cloud assets include Google Cloud projects and Cloud Billing accounts.
Cloud projects: The checkbox to Auto-assign any newly created Google Cloud project to the bucket that holds its linked billing account is selected by default. Note that this setting applies only to projects created after you enable invoice bucketing. For existing projects, you have to manually assign them to your target bucket.
Cloud Billing accounts: Some costs are not related to a specific project, for example, support costs. They are charged at the Cloud Billing account level. Therefore, you also need to assign Cloud Billing accounts to buckets.
Default bucket
You can designate any existing bucket as the default bucket.
If all the unassigned assets are of the same asset type, they will be added to the default bucket when generating invoices.
If the unassigned assets are of mixed types, the DoiT Platform may revert back to invoicing by asset type or assign the assets to some random buckets.
To make a bucket the default bucket:
Select the target bucket from the bucket list.
Select Set as default.
You can have only one default bucket.
Delete a bucket
You can delete a bucket only if there is no asset assigned to it.
To delete a bucket:
Select the target bucket from the bucket list.
Delete all the assets from the assets field of the bucket.
Select Delete bucket.
Example invoices
If you've set up invoice bucketing, you'll receive one invoice per custom bucket.
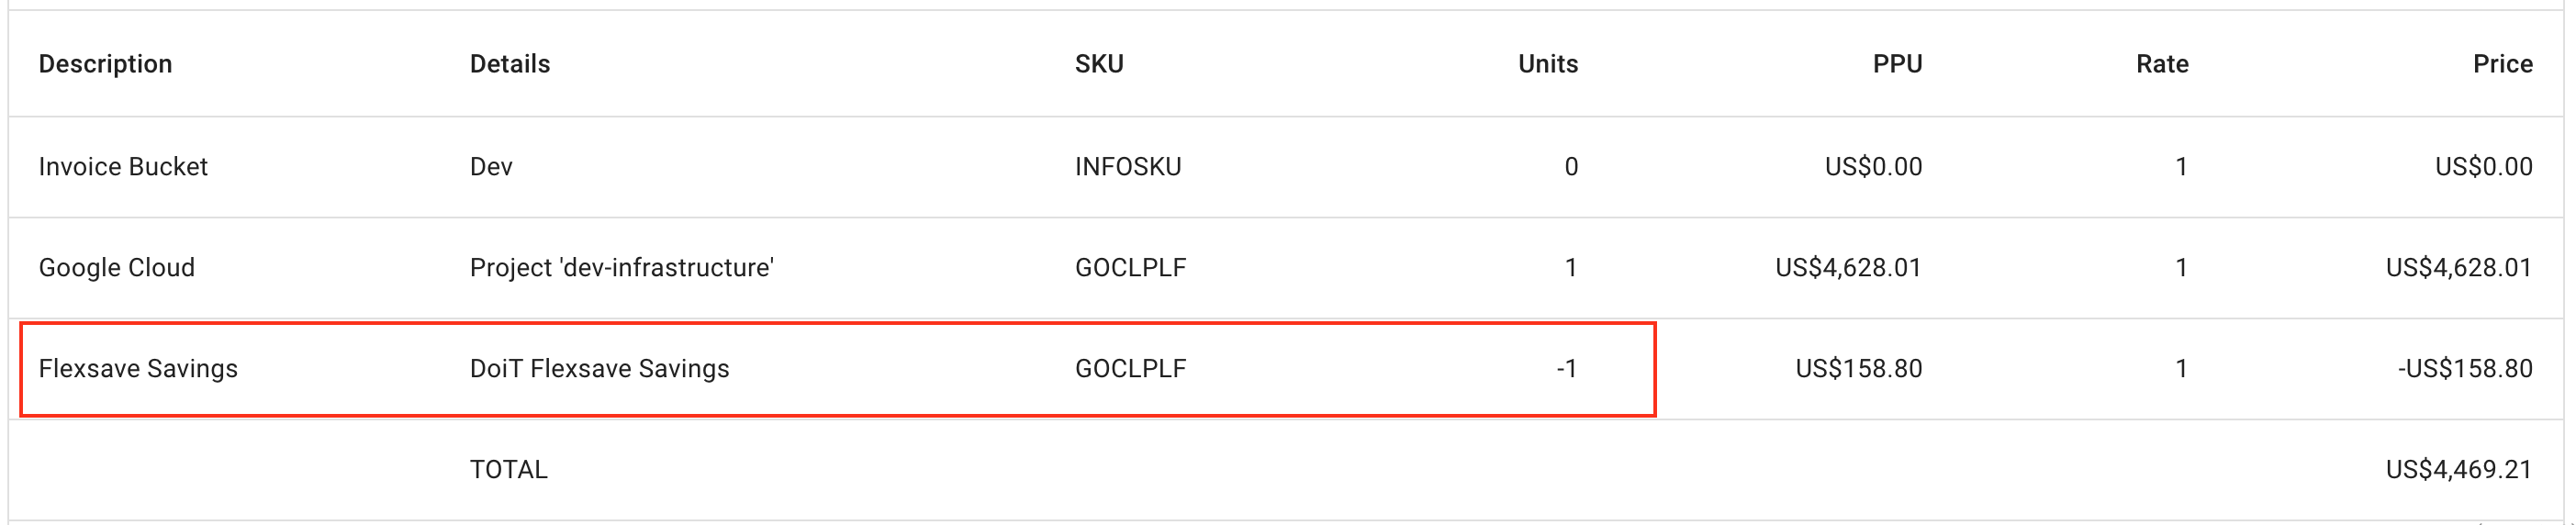
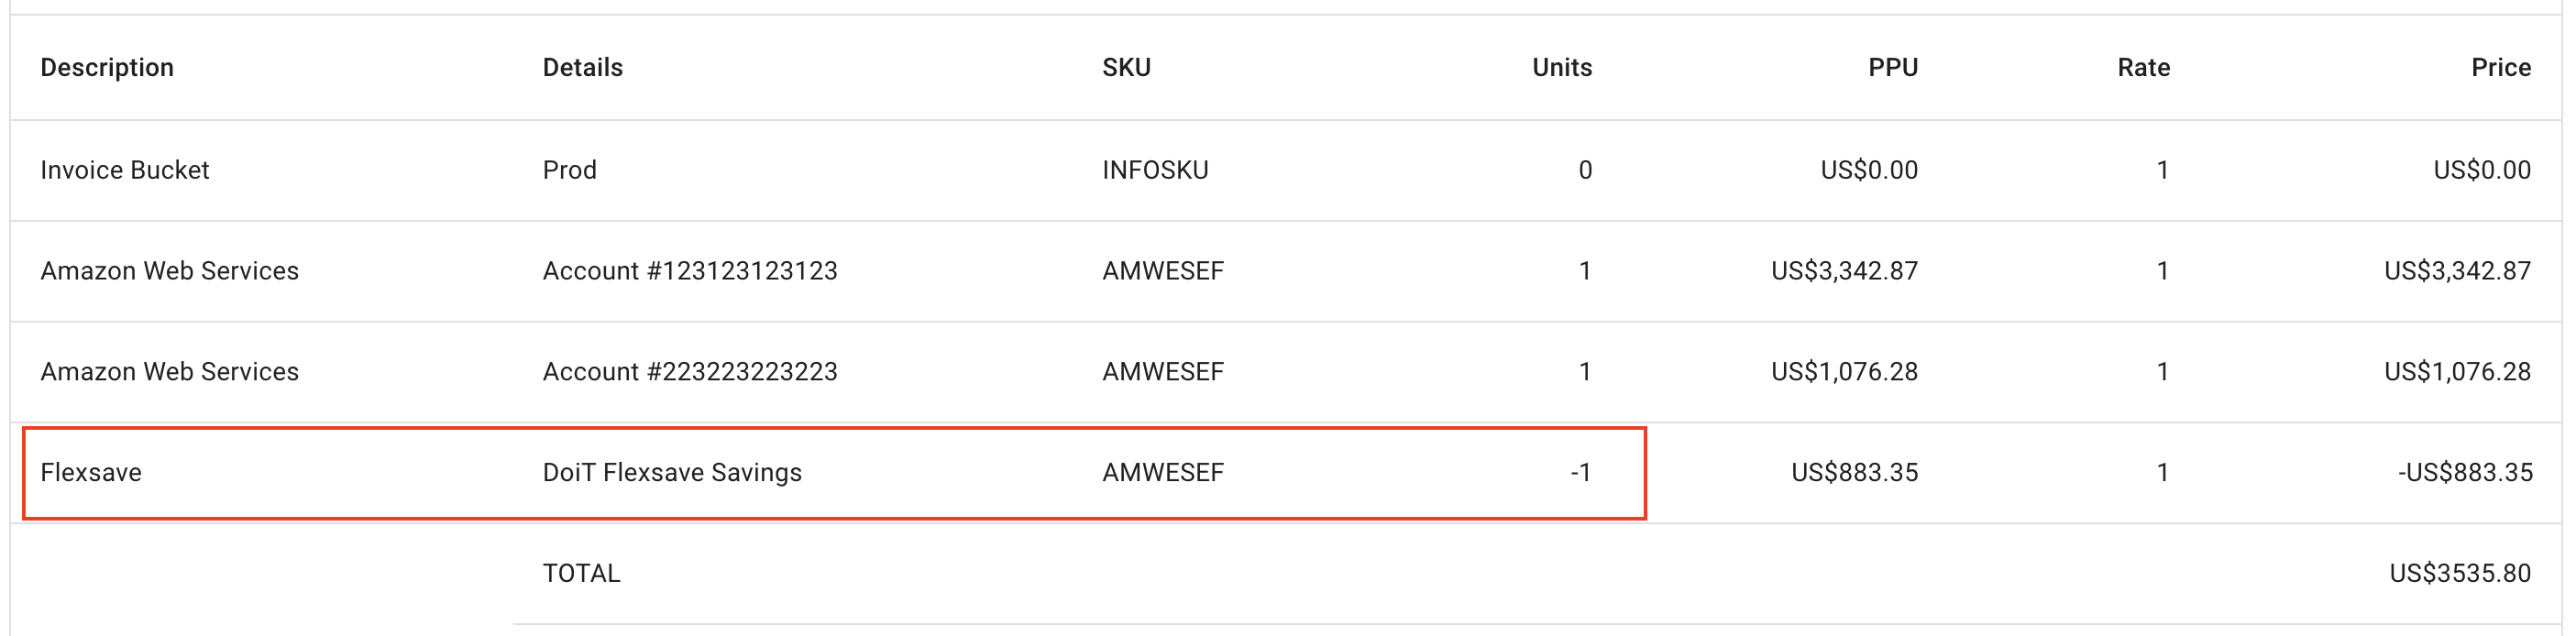
Invoice of a custom bucket
Below is an example invoice issued on a custom bucket named Invoice Bucket 1.
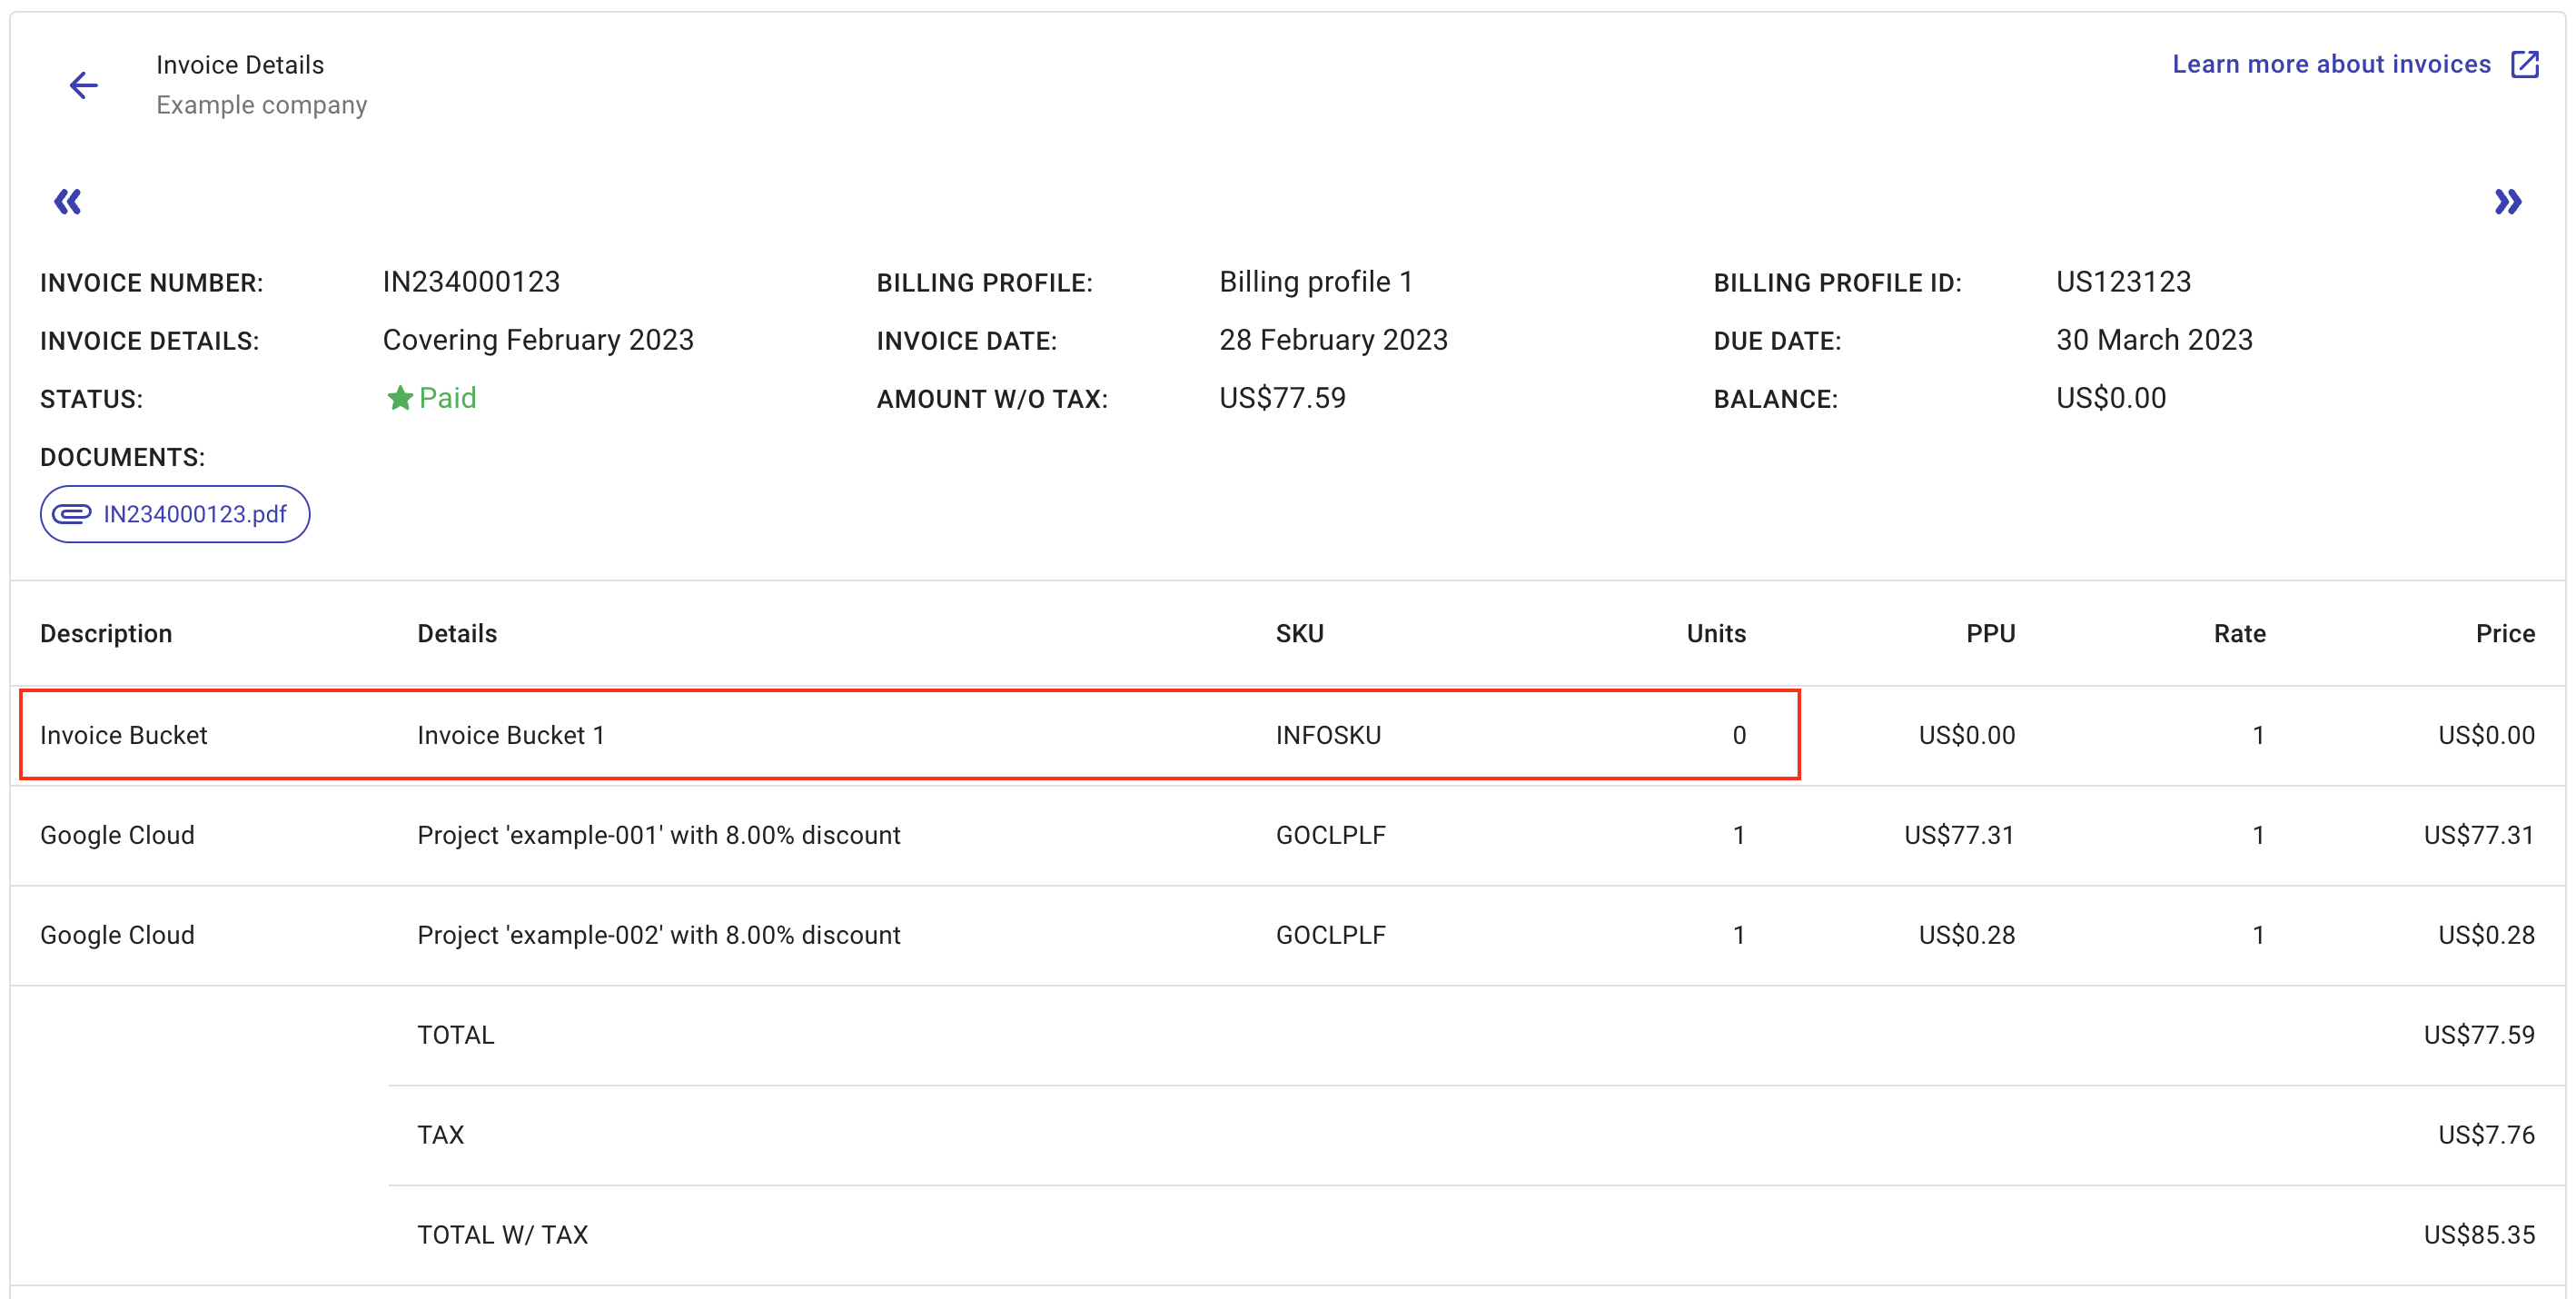
The first line item is always Invoice Bucket /
bucket_name. It is associated with the SKUINFOSKUand has a quantity (Units) 0, which means you do not pay for the bucket itself.The following line items correspond to the member assets in the bucket.
Flexsave savings in buckets
If Flexsave has been activated on your account, starting with March 2023 invoices, you'll see the line item Flexsave Savings / DoiT Flexsave Savings on bucket invoices when there are savings on the member assets.
Example: Flexsave for Google Cloud
See Flexsave invoicing for more information.
Example: Flexsave for AWS
See Flexsave invoicing for more information.