Activate Flexsave for AWS
Provide payment information
To activate Flexsave, you must first set up billing. DoiT invoices you for a percentage of the savings generated by Flexsave.
Provide the payment information as indicated on the page, including:
- Billing address: The billing address of your organization
- Company details: Company name and registration number (Tax ID)
- Contact details: Accounts payable details
- Payments: Payment method and currency
Then, select Confirm Payment Information to create your billing profile and return to the Flexsave AWS page.
Here you can:
- Switch Organizations to switch to a different AWS Organization if you have attached multiple AWS Organizations
- Select Start a new estimate for a new AWS Organization
- Select VIEW to check your payment information
- Select Set up Flexsave to continue the activation process
You only need to provide your payment information once, even if you have attached multiple AWS Organizations.
Activate Flexsave
Flexsave must be activated for each AWS Organization separately.
If you have multiple AWS Organizations, make sure to select the correct AWS Organization ID from the Organizations drop-down before continuing.
To proceed with Flexsave activation, you must read the DoiT International Flexsave Agreement text in full, complete the short accompanying form (two checkboxes), and select CONFIRM AGREEMENT.
Flexsave works by dynamically attaching DoiT-owned AWS accounts with Flexsave Plans to your organization. These accounts contain no resources other than Flexsave Plans. When our AWS accounts are attached to your organization, AWS automatically applies our Flexsave Plans to your eligible compute workloads.
To provide the additional access needed for Flexsave to work, we have prepared another template CloudFormation stack for you to create.
However, you will need to supply an AWS Cost and Usage Report (CUR) before doing that. We will periodically fetch this report and use the data to model your current and future compute usage, allowing Flexsave to predict the ideal blend of Plans to maximize your coverage.
You may already have a Cost and Usage Report for your AWS account.
However, unless it matches the specification required for Flexsave (detailed in the next section), you will need to reconfigure it or create a new one. Many of our customers find it easier and more intuitive to create a new report than to reconfigure an existing one.
The cost of creating a new Cost and Usage Report is the same as the cost of a small S3 bucket.
Create a new report
To create a new AWS Cost and Usage Report, follow the instructions in the AWS: Create a Cost and Usage Report document, with the following in mind:
- You must select Include resource IDs
- The Data refresh settings setting does not affect Flexsave
- When you Configure S3 Bucket, please make a note of the S3 bucket name you choose (you will need it for the next section)
- Please make a note of the Report path prefix you choose (you will need it for the next section)
- For Time granularity, you must select Hourly
- Report versioning does not affect Flexsave
- For Enable report data integration for, select Amazon Redshift or Amazon QuickSight (i.e., produces CSV files with
.gzcompression)
When you're done, your report should look something like this:
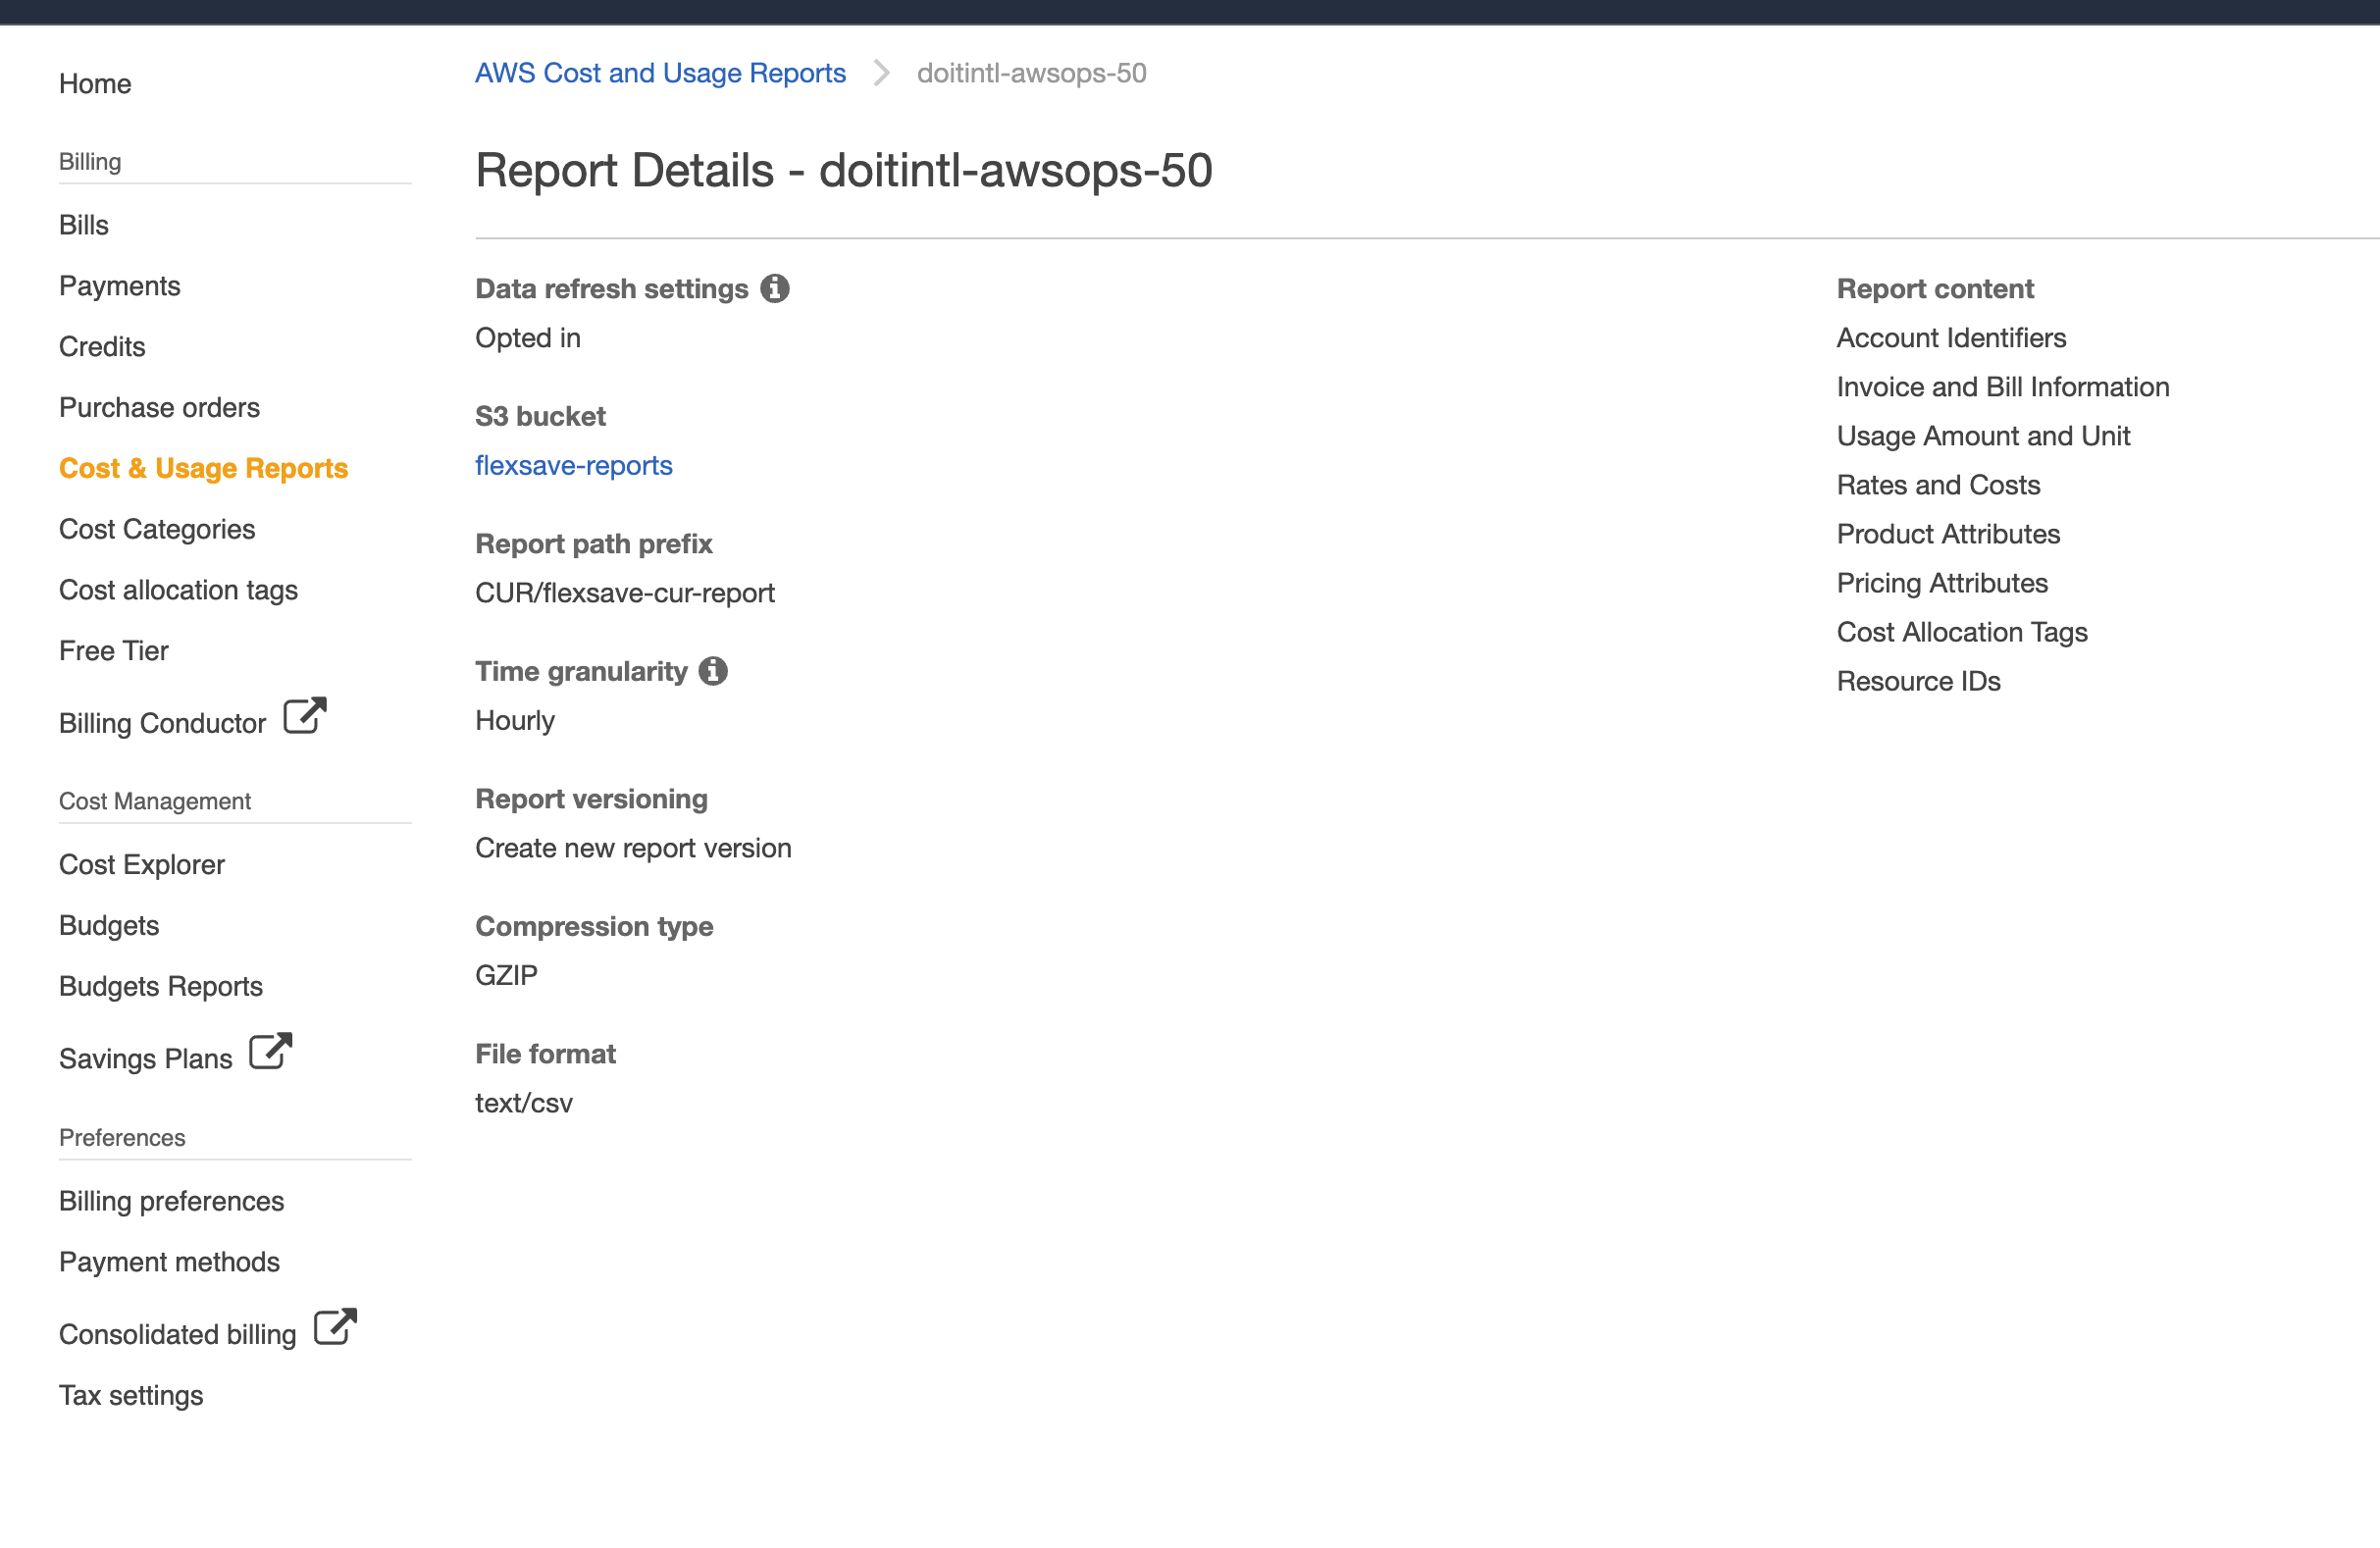
In the example above, note:
- The S3 bucket value is
flexsave reports - The Report path prefix value is
CUR/flexsave-cur-report - The Time granularity value is Hourly
- The Compression type value is GZIP
- The File format value is
text/csv - The Report content list contains Resource IDs
From this list, you are free to choose a custom S3 bucket name and Report path prefix. However, your report must match all of the other values.
Verify access to your report files
Before you proceed to the next section and create your CloudFormation stack, you must:
Wait for your report to be run at least one time (this should happen within an hour)
Verify that at least one report file (with a
.gzsuffix) is visible in the S3 bucket at the path you configured when creating the report
Set up your report files
After verifying access to your report files, return to the Flexsave sign-up flow and complete the form:
For S3 bucket, enter the bucket name you chose for the Configure S3 Bucket step when creating the AWS Cost and Usage Report in the previous section.
For Report path prefix, enter the path prefix you chose for the Report path prefix step when creating the AWS Cost and Usage Report in the previous section.
When you are done, select OPEN AWS CLOUDFORMATION CONSOLE.
The page will display an error message if we cannot access your report files. If this happens to you, it may be for one of the following reasons:
- The S3 bucket URL or Report path prefix value may be incorrect
- Your report has not run yet (see Verify access to your report files)
Create a CloudFormation stack
If we can access your report files successfully, the browser will prompt you to log in to your AWS console.
You must authenticate using the same management account as you did when getting your estimation.
After logging in to your AWS console, AWS will prompt you to create the CloudFormation stack from our template configuration:
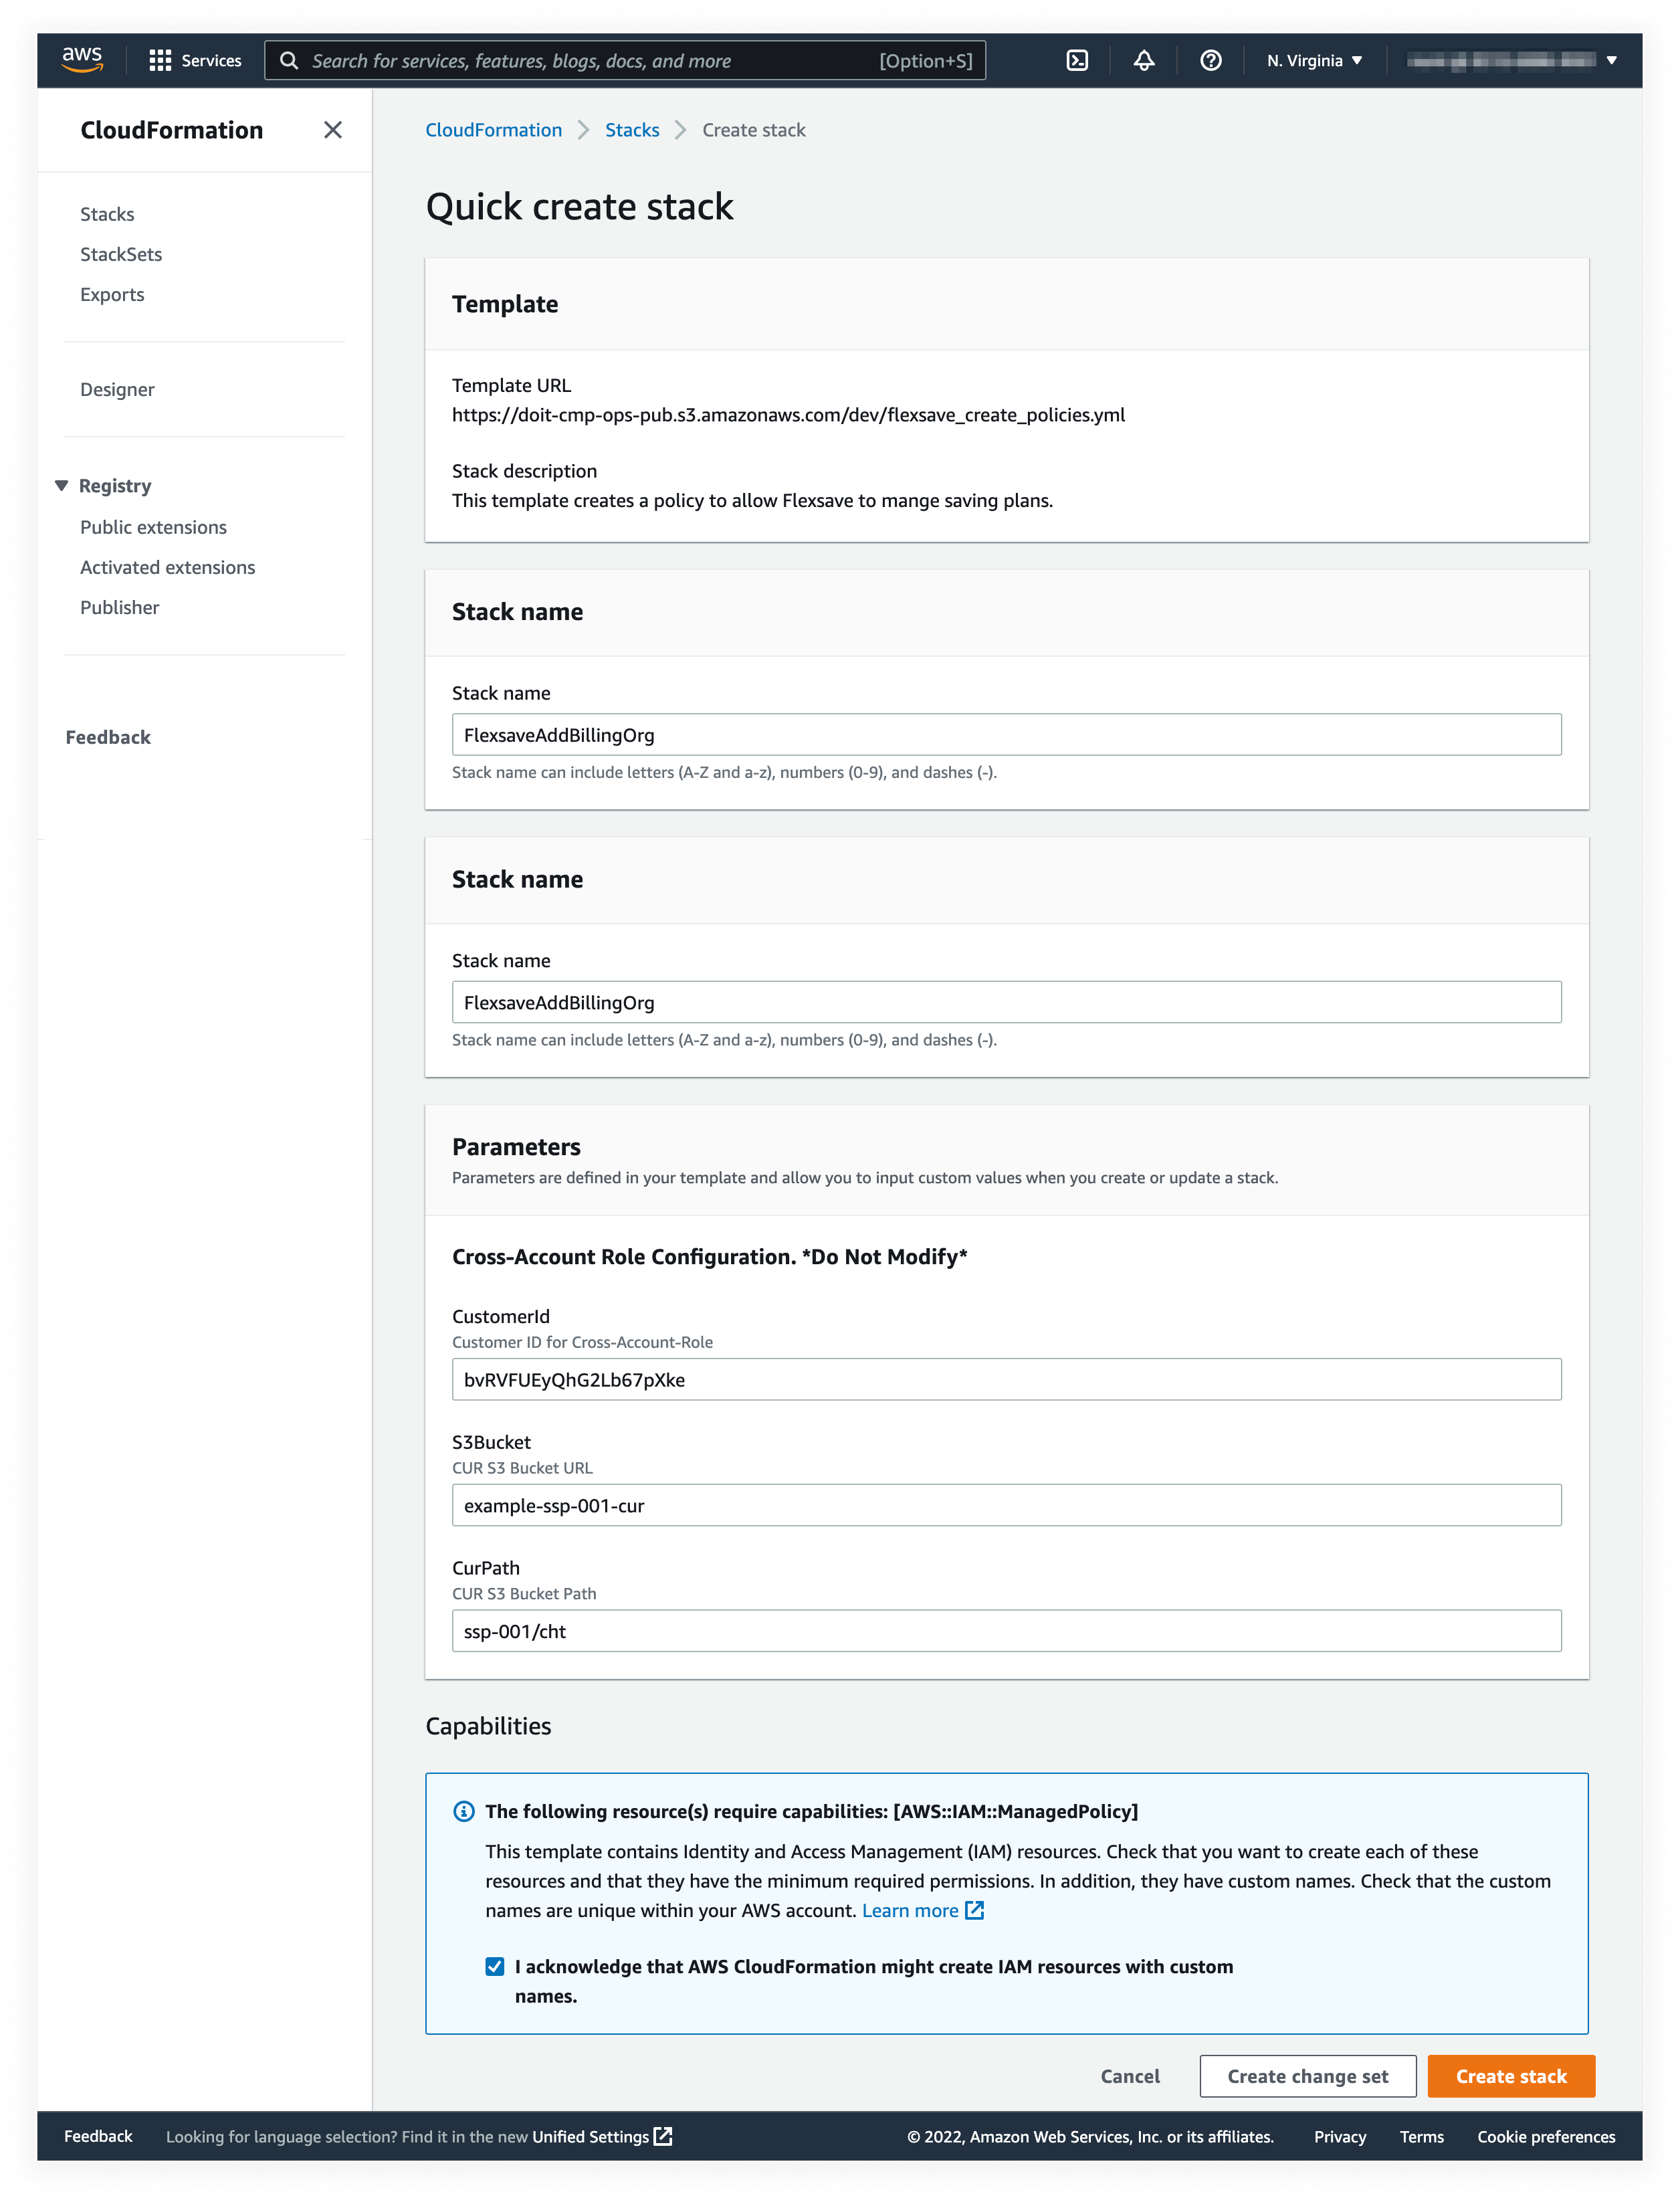
If you are happy with the configuration, scroll to the bottom of the page and select the Capabilities checkbox indicating that you acknowledge that AWS CloudFormation might create IAM resources with custom names (in this instance, the doitintl_cmp role).
Finally, select CREATE STACK.
The AWS console will take you to the stack overview screen:
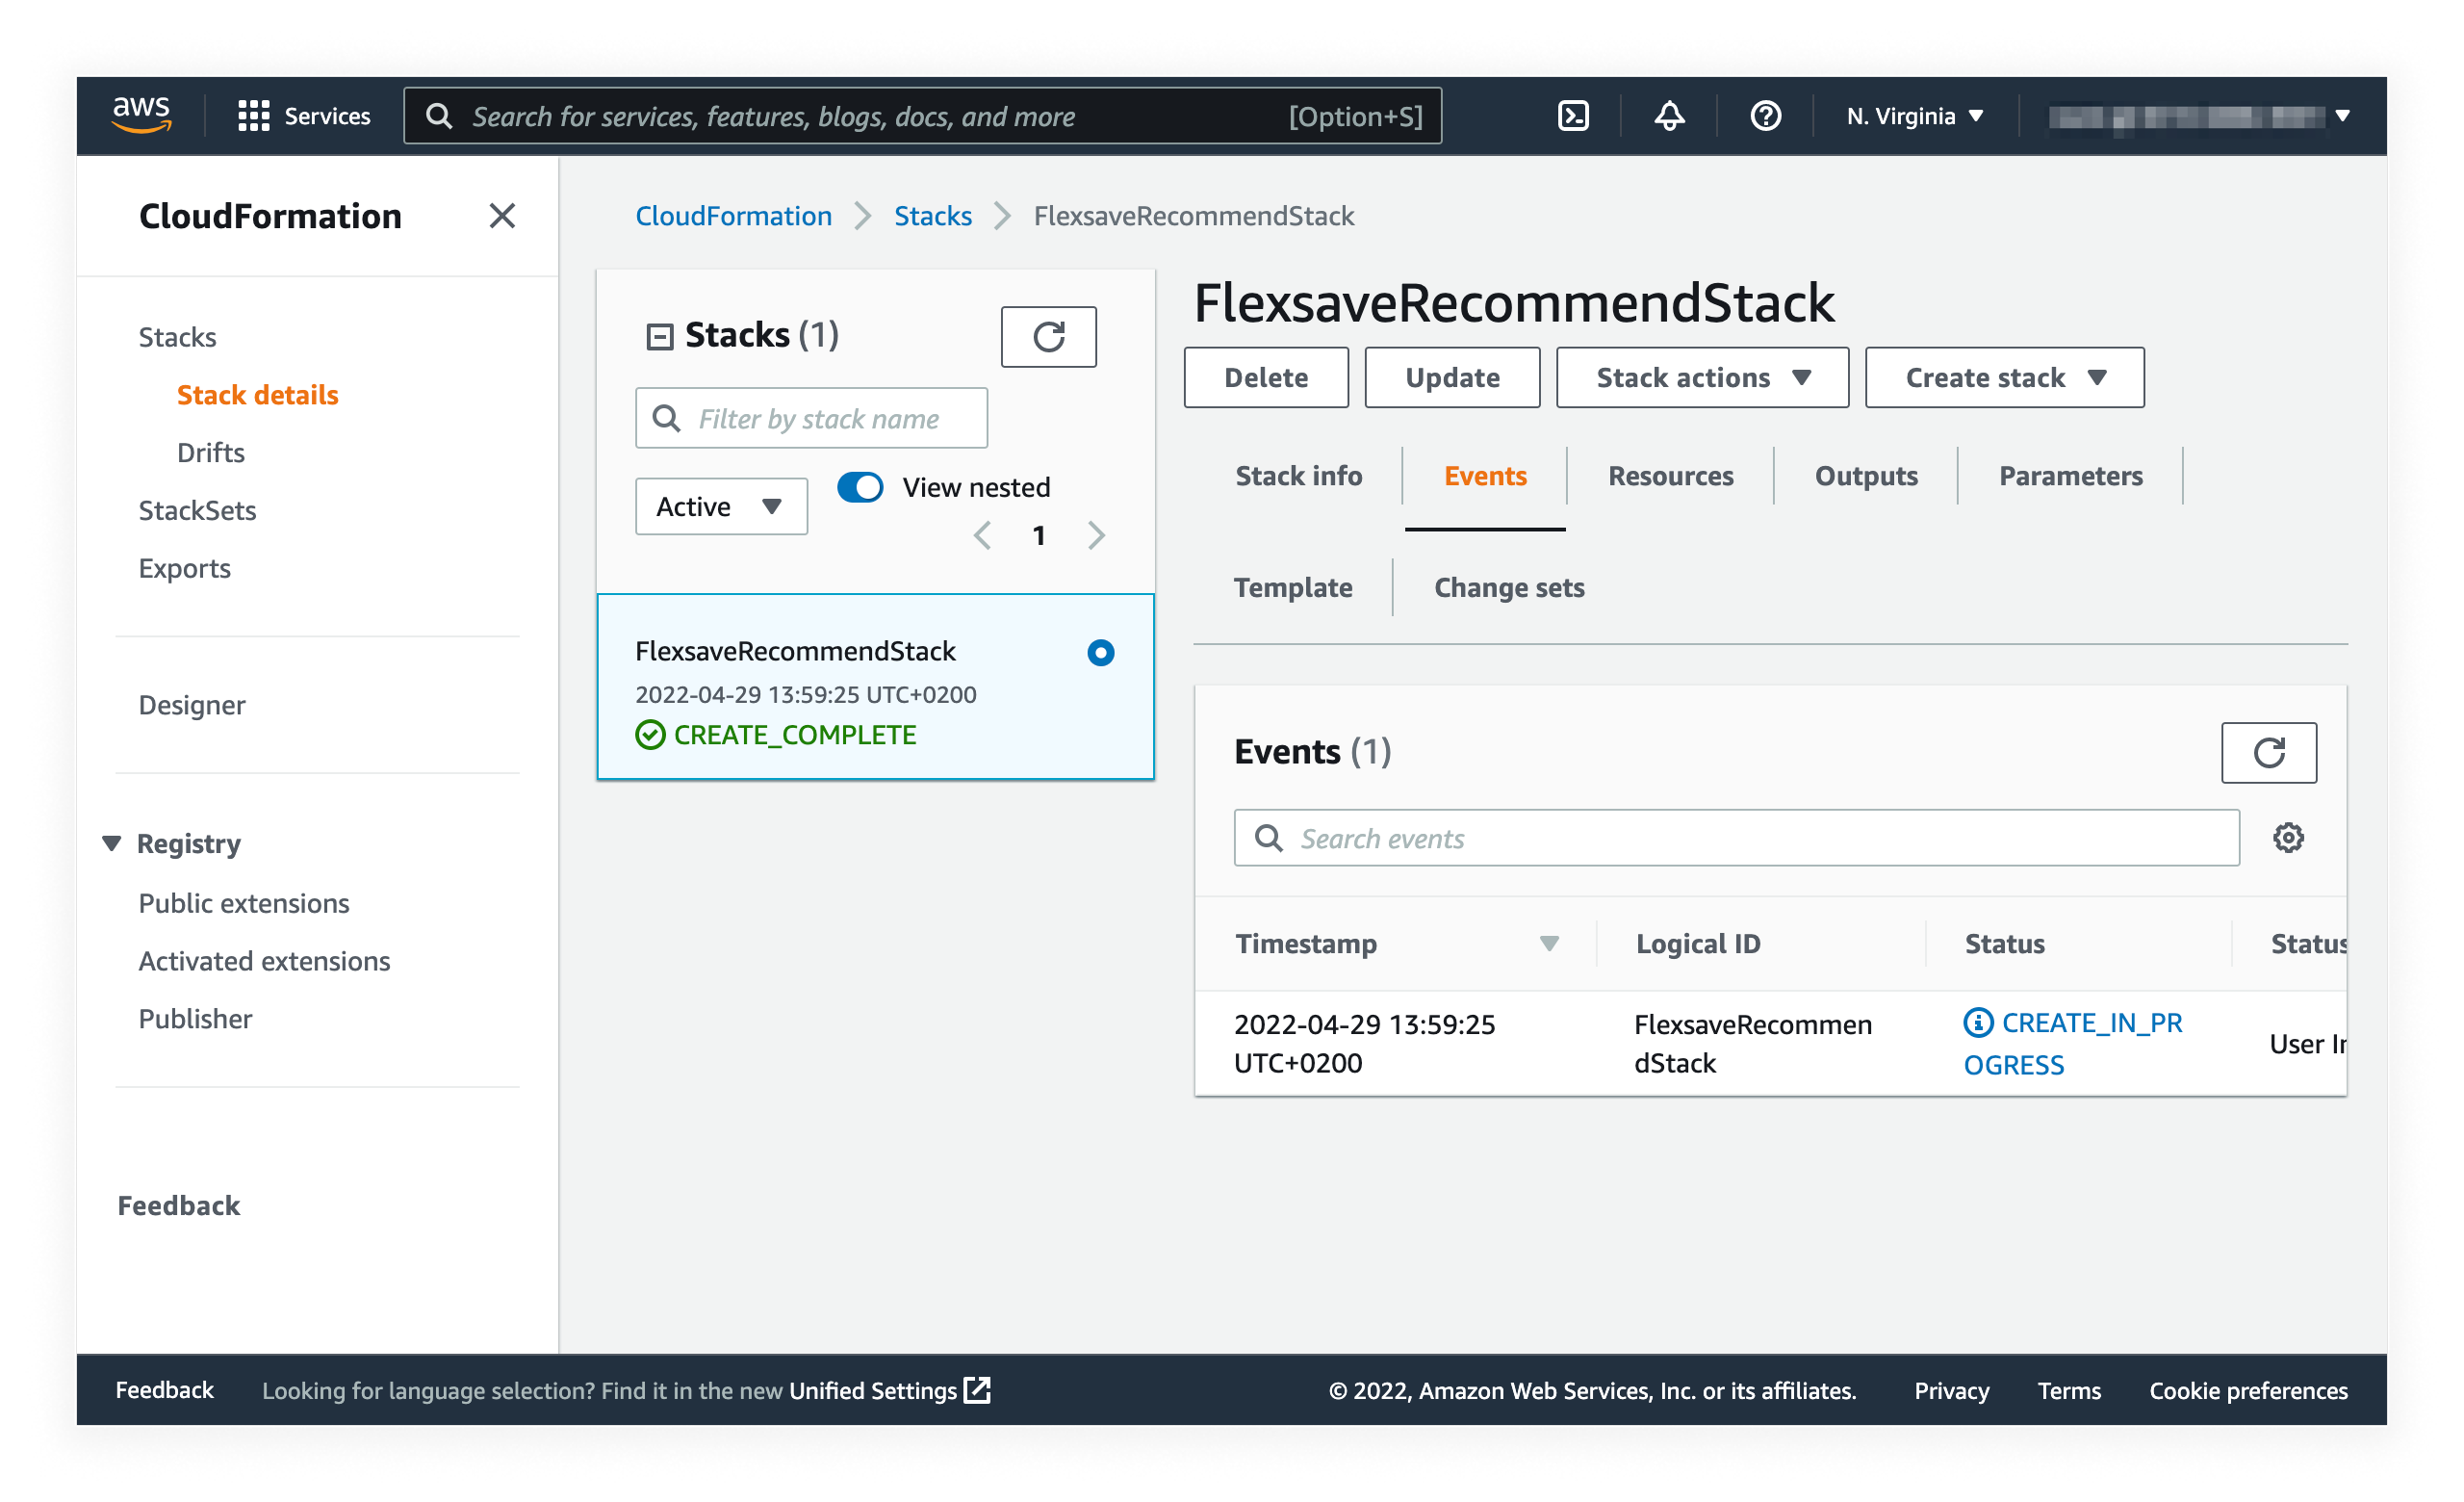
At first, the status of your stack will be CREATE_IN_PROGRESS. Eventually, the status will change to CREATE_COMPLETE. We will wait for the stack to be created before attempting to fetch your billing data.
Switch back to the sign-up flow and select DONE.
Next steps
Once activated, Flexsave will start processing your information and building an optimization plan. The whole process may take up to 24 hours. You'll be notified by email when it is complete.
For Flexsave to work, you must enable Reserved instances and Savings Plans discount sharing in your AWS billing preferences.